One of the biggest mistakes that people make when building their preparedness plan is that they figure that since they are going to ‘stand their ground’ and shelter in place, that mobility and go-bags, e-kits, caches, or planned alternate routes, situational awareness and DSS are only for at their retreat or home, if they need them at all. These people couldn’t be more wrong!
Another common mistake is to assume that ‘this won’t happen here or to me’. I don’t know if these people are really listening to the news, or not, I would guess not. They definitely don’t realize that most crises occur without notice. Very few give us warning and those that do are usually short notice to boot. Many others place an overwhelming amount of faith in the ingenuity and inventiveness of humans or worse, have too much faith that some government or charitable entity will come to their rescue. Again they couldn’t be more wrong!
I don’t care if you are an individual, a household or a group, this is the first post-crisis place that puts humans in danger. The unprepared will stand around waiting for someone to come along and help them or waste precious time trying to figure out how to get home. Some of the unprepared may also be uninformed and pick a spur of the moment alternate route that leads them into even greater dangers. The possibilities are endless when it comes to the actions of the unprepared.
This next set of information collection exercises for building a needs based preparedness plan are vital and they will be based on the worst possible crisis scenario –
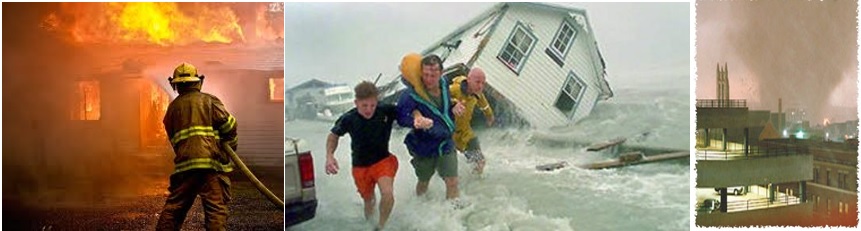
We are away from our homes (retreat), on foot, our usual routes and modes of transportation are unavailable and the only supplies we have are what were with us when the crisis hit. Outside help is, at best, 3-5 days away. Phones and electricity are out, can’t pump gas, can’t ring up any sales, water and sewage systems are out, natural gas is out and public safety has been caught with their pants down.
Another common mistake is to assume that ‘this won’t happen here or to me’. I don’t know if these people are really listening to the news, or not, I would guess not. They definitely don’t realize that most crises occur without notice. Very few give us warning and those that do are usually short notice to boot. Many others place an overwhelming amount of faith in the ingenuity and inventiveness of humans or worse, have too much faith that some government or charitable entity will come to their rescue. Again they couldn’t be more wrong!
I don’t care if you are an individual, a household or a group, this is the first post-crisis place that puts humans in danger. The unprepared will stand around waiting for someone to come along and help them or waste precious time trying to figure out how to get home. Some of the unprepared may also be uninformed and pick a spur of the moment alternate route that leads them into even greater dangers. The possibilities are endless when it comes to the actions of the unprepared.
This next set of information collection exercises for building a needs based preparedness plan are vital and they will be based on the worst possible crisis scenario –
We are away from our homes (retreat), on foot, our usual routes and modes of transportation are unavailable and the only supplies we have are what were with us when the crisis hit. Outside help is, at best, 3-5 days away. Phones and electricity are out, can’t pump gas, can’t ring up any sales, water and sewage systems are out, natural gas is out and public safety has been caught with their pants down.
We will require a few tools to accomplish this part of our information collection –
The first part of this information gathering is determining all of our usual activities, their frequency, location and whom we are likely to be with at any given time. Oh we can’t cover everything, however we can figure out all the regular routine stuff.
Who, What, When, Where Schedule
Make a schedule or list of everything each member of your household usually does. Like school, work, sports, shopping, entertainment, doctor’s appointments and the like. This is your Who, What, When, Where Schedule. Don’t worry if you don’t always know the exact particulars to each aspect.
The following is an example of the Doe family schedule, which consists of two adults, two children and a German shepherd dog.
- A map of your town and surrounding area
- Acetate/plastic sheets (like the ones used on those old overhead projectors)
- Grease pencils or dry erase markers (enough colors for each member of your household)
- Paper clips
The first part of this information gathering is determining all of our usual activities, their frequency, location and whom we are likely to be with at any given time. Oh we can’t cover everything, however we can figure out all the regular routine stuff.
Who, What, When, Where Schedule
Make a schedule or list of everything each member of your household usually does. Like school, work, sports, shopping, entertainment, doctor’s appointments and the like. This is your Who, What, When, Where Schedule. Don’t worry if you don’t always know the exact particulars to each aspect.
The following is an example of the Doe family schedule, which consists of two adults, two children and a German shepherd dog.
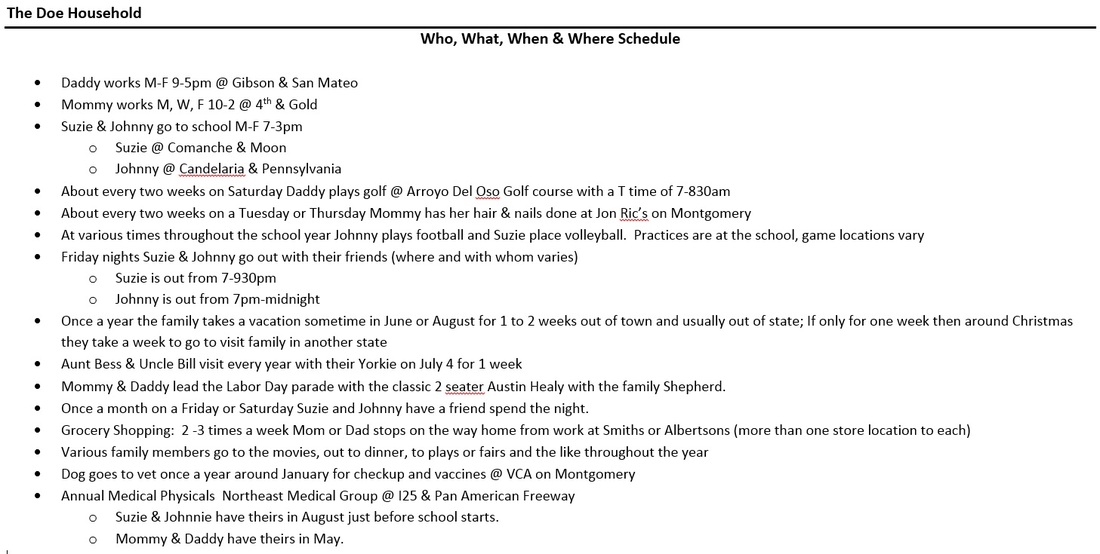
As you can see coming up with the ‘schedule’ is going to take a bit of thought. For some things you may not know exactly where you will be or when and with whom. At least list the usual ‘haunts’ or ‘hang-outs’ and which members of your household this applies to on this schedule.
Tip: It is a good idea to collect addresses and phone numbers to these various activity locations and keep this list in the ‘Communication’ section of your Important Documentation Book.
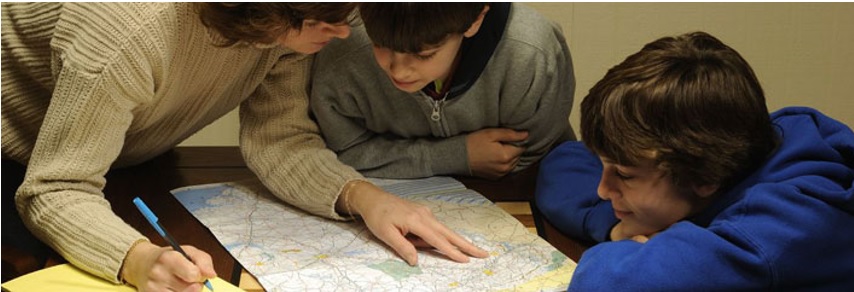
The Activity Map
The next thing to do is to pull out that map of your town and surrounding area and put a big ‘X’ where your home is. Most of us plan to shelter in place and the best place is our own homes. After all that is where all of our stuff is right?!
Then mark all these activity locations on our map, using a different color marker and or different symbol for each household member. Now take a good long look at this map.
We live our lives out and about don’t we? Yeppers, just getting home after a crisis will be a mobility task that we cannot ignore.
Consider how long it will take you to walk from any of these locations to your home? Are the sidewalks still viable? What is the overall environment (weather, road blocks, etc) likely to be immediately following the crisis? Can we walk from here to our homes or retreat, with no help, in 3 days or less, even if you have a minor injury?
If you do not think you can do that, then consider if you have any friends , relatives or ‘safe’ spot between the activity location and your home that you can use as a temporary ‘safe house’ or rest stop.
Next review your Moderated Crisis List. Are there any crises that may render your house off limits? Just so you know there is at least one that will – FIRE and depending on what is on your list, there may be other crises that will do this too.
This means we need to consider, at minimum, one other secondary retreat. Again, depending on what crises are on your list, and if you lean towards the preparedness rule of redundancy, you may need to select more than one secondary retreat. Just make sure these retreats are outside the scope of involvement of any crisis on your list and are not a public shelter or evac center.
These ‘retreats’ don’t have to a cabin in the woods, an RV that runs on bio-diesel or the like. Consider family and friends, even if they themselves are not Preppers.
For example, let’s say that your home has a chance of being flooded by a nearby stream. You can ask a non-Prepper friend or relative if your family can go to them for at least the first 2 weeks after the flood hits and if you can store some stuff in their garage or attic for your family to use. Then if some other larger scope of involvement, longer duration crisis hits, they won’t care if you are there, especially if your family arrives prepared. Fact is they will most likely be grateful and latch onto you because you appear to know what you are doing.
If this other friend or relative is a Prepper, well asking is a breeze. Just say ‘can you be our secondary retreat and may we store some stuff here; in exchange we’ll do the same for you’.
Mark these secondary retreats, safe houses and rest stops on your map. Use a symbol or color that tells you what they are (rest stop, secondary retreat 1, secondary retreat 2 and so on. Quite a few people will use underlines to a symbol to signify the retreat = 1 underline – secondary retreat 1, 2 underlines = secondary retreat 2, etc).
Up to now was probably rather difficult, however the most trying part is next. It’s time to paperclip those acetate/plastic sheets over your map.
Pick at least 2 alternate routes from each activity location, to each possible retreat. This may sound easy to some, yet we must remember we are doing ‘worst case scenario’ here– we are on foot with only what we had with us when the crisis hit and the usual does not apply.
While you are selecting these alternate routes, consider the terrain, each household members physical capabilities and what is along these routes. After all in a worst case scenario mode, we may not be able to use the actual road or sidewalk itself. Are there any places along the way that will be ‘safe’ (protection from the elements or people) to stop and rest, and leave a secret signal for another household member? (Now you know why I said to use the acetate/plastic sheets so you can erase and try again.)
Once you have finalized these alternate routes, mark them on the actual map and then replace the acetate/plastic sheets for the next step.
This step tends to cause people to roll their eyes, throw their hands up in the air and yell ‘I quit’! Just hear me out before you do that.
Tip: It is a good idea to collect addresses and phone numbers to these various activity locations and keep this list in the ‘Communication’ section of your Important Documentation Book.
The Activity Map
The next thing to do is to pull out that map of your town and surrounding area and put a big ‘X’ where your home is. Most of us plan to shelter in place and the best place is our own homes. After all that is where all of our stuff is right?!
Then mark all these activity locations on our map, using a different color marker and or different symbol for each household member. Now take a good long look at this map.
We live our lives out and about don’t we? Yeppers, just getting home after a crisis will be a mobility task that we cannot ignore.
Consider how long it will take you to walk from any of these locations to your home? Are the sidewalks still viable? What is the overall environment (weather, road blocks, etc) likely to be immediately following the crisis? Can we walk from here to our homes or retreat, with no help, in 3 days or less, even if you have a minor injury?
If you do not think you can do that, then consider if you have any friends , relatives or ‘safe’ spot between the activity location and your home that you can use as a temporary ‘safe house’ or rest stop.
Next review your Moderated Crisis List. Are there any crises that may render your house off limits? Just so you know there is at least one that will – FIRE and depending on what is on your list, there may be other crises that will do this too.
This means we need to consider, at minimum, one other secondary retreat. Again, depending on what crises are on your list, and if you lean towards the preparedness rule of redundancy, you may need to select more than one secondary retreat. Just make sure these retreats are outside the scope of involvement of any crisis on your list and are not a public shelter or evac center.
These ‘retreats’ don’t have to a cabin in the woods, an RV that runs on bio-diesel or the like. Consider family and friends, even if they themselves are not Preppers.
For example, let’s say that your home has a chance of being flooded by a nearby stream. You can ask a non-Prepper friend or relative if your family can go to them for at least the first 2 weeks after the flood hits and if you can store some stuff in their garage or attic for your family to use. Then if some other larger scope of involvement, longer duration crisis hits, they won’t care if you are there, especially if your family arrives prepared. Fact is they will most likely be grateful and latch onto you because you appear to know what you are doing.
If this other friend or relative is a Prepper, well asking is a breeze. Just say ‘can you be our secondary retreat and may we store some stuff here; in exchange we’ll do the same for you’.
Mark these secondary retreats, safe houses and rest stops on your map. Use a symbol or color that tells you what they are (rest stop, secondary retreat 1, secondary retreat 2 and so on. Quite a few people will use underlines to a symbol to signify the retreat = 1 underline – secondary retreat 1, 2 underlines = secondary retreat 2, etc).
Up to now was probably rather difficult, however the most trying part is next. It’s time to paperclip those acetate/plastic sheets over your map.
Pick at least 2 alternate routes from each activity location, to each possible retreat. This may sound easy to some, yet we must remember we are doing ‘worst case scenario’ here– we are on foot with only what we had with us when the crisis hit and the usual does not apply.
While you are selecting these alternate routes, consider the terrain, each household members physical capabilities and what is along these routes. After all in a worst case scenario mode, we may not be able to use the actual road or sidewalk itself. Are there any places along the way that will be ‘safe’ (protection from the elements or people) to stop and rest, and leave a secret signal for another household member? (Now you know why I said to use the acetate/plastic sheets so you can erase and try again.)
Once you have finalized these alternate routes, mark them on the actual map and then replace the acetate/plastic sheets for the next step.
This step tends to cause people to roll their eyes, throw their hands up in the air and yell ‘I quit’! Just hear me out before you do that.
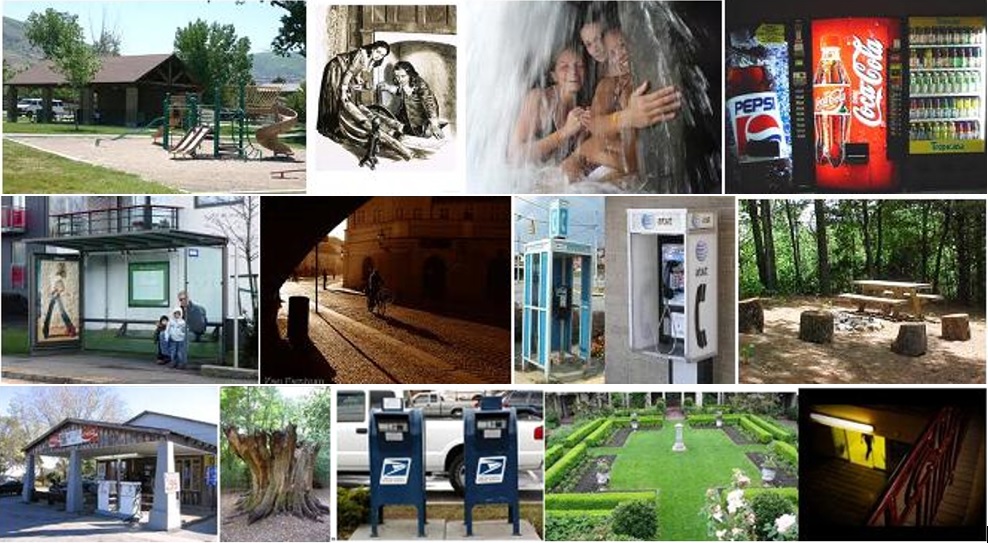
We now need to pick at least 2 locations along each of these alternate and primary routes that can be used as rest, rendezvous, and/or secret communication stops.
Keep in mind protection from the elements and or people, and what is along the route that one can carve or scratch a symbol on. Like say a park bench, tree trunk, rock, outdoor newspaper/vending machine, underpass, wall, fence and the like.
Also keep in mind that you may have routes that cross each other, merge or come within a block or two of each other, even if they are from different activity locations going to different retreats.
This allows you to utilize one secret communication/rest stop that serves more than one route.
See, you can stop rolling your eyes now ;-}
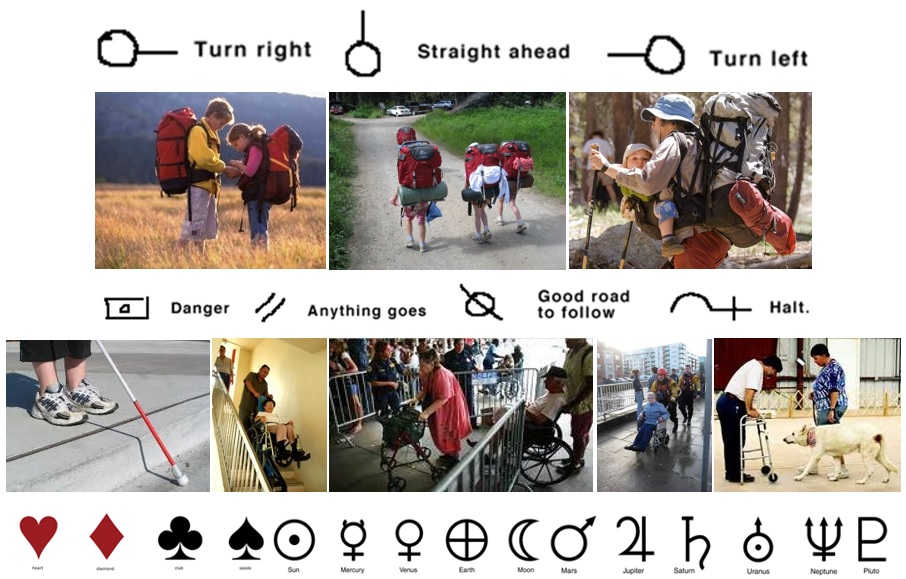
If you haven’t already done so, select a symbol for each household member. Keep it simple so that it is easy to freehand or scratch onto something.
Tip: Many people then use lines under the symbol to signify to which alternate retreat they are heading towards; one line for secondary retreat 1, two lines for secondary retreat 2 and so forth. You house or primary retreat will have no lines.
These symbols can be anything from hearts, diamonds, clubs and spades or trail signs, to ones of your own invention. They only need to be simple to draw, carve or scratch onto some surface.
If you have young children, infants, toddlers or a family member with some kind of mobility disability or health condition consider this:
These individuals usually do not travel anywhere without someone else who has no mobility disability or is old enough to grasp what is being discussed in our preparedness plan.
When it comes time to do a practice drill (there should be at least one a year), make it easy on yourself by borrowing or renting a bicycle, wheelchair or motor scooter chair. This way you are not risking anyone’s health or taxing their patience.
It has been found that just being familiar with the route will reduce the stress from any crisis by half, no matter the age of the individual. Increase familiarity and reduce stress and you increase one’s survivability quotient 10 fold.
Most children will not be frightened by this kind of activity. In fact studies have shown that they tend to be more secure and will often want to help in any way they can.
Keeping all household members in the loop and having them participate, even the very young, shows they are being ‘taken care of’ and protected against all kinds of knowns and unknowns.
Ok, I have stressed several times that our worst case scenario is on foot with what we have with us at the time the crisis struck and without the usual routes or modes of transportation being available. So to increase our survivability quotient it pays to have a few things with us that we otherwise would not carry. This is where go-bags come into play.
Grab-bags, go-bags, e-kits, 72 hour bags and bug-out bags come in all sizes and shapes, have all kinds of catchy names, and range from 3-10 day survivability. For this discussion I am going to center on the 3-day or 72 hour bag, as I am assuming that most people will only need this emergency bag to get them safely from where ever they are when the crisis hits to home and can usually do that, on foot, in 3-days or less.
No matter what, these bags primary purpose is to provide the basics to life (human or pet) for, in this case, 72 hours or 3 days. The basics in the first 72 hours after a crisis hits are:
Go-bags should be as light as possible. I believe the average fit person can easily carry up to one third of their body weight. However, I do know that as we age, we usually can carry less and less. When in my prime I could carry a 60-75 lb pack, today I can’t top 30 lbs. and do best around 20 lbs.
This means anything we put in the bag should be small, compact, light-weight and as multi-functional as possible. For example the basics are:
Grab-bags, go-bags, e-kits, 72 hour bags and bug-out bags come in all sizes and shapes, have all kinds of catchy names, and range from 3-10 day survivability. For this discussion I am going to center on the 3-day or 72 hour bag, as I am assuming that most people will only need this emergency bag to get them safely from where ever they are when the crisis hits to home and can usually do that, on foot, in 3-days or less.
No matter what, these bags primary purpose is to provide the basics to life (human or pet) for, in this case, 72 hours or 3 days. The basics in the first 72 hours after a crisis hits are:
- Air
- Food (nutrition)
- Water (container & purification tools)
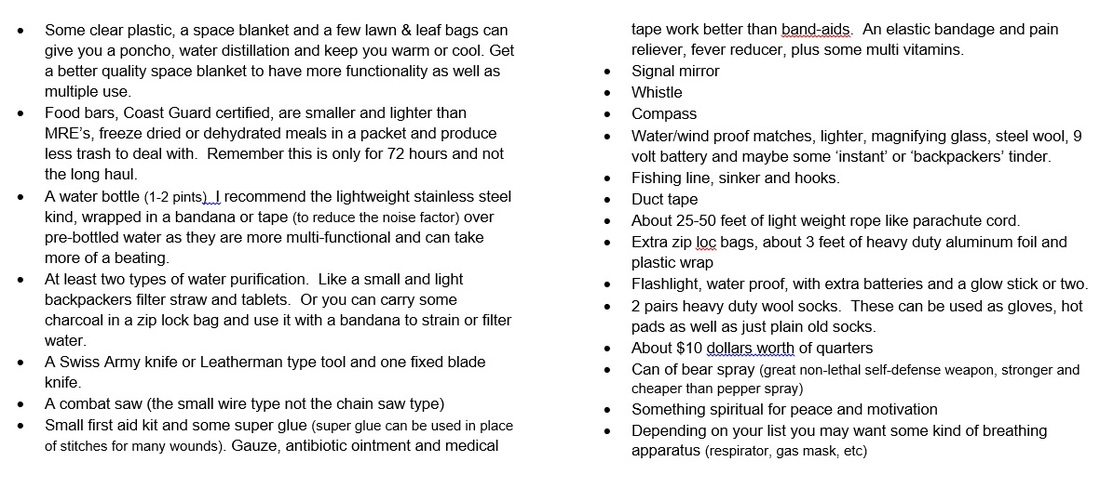
- Protection from the elements (space blanket, fire, heat, cooling)
- First Aid/Medication
- DSS (Defense, Safety, Security)
Go-bags should be as light as possible. I believe the average fit person can easily carry up to one third of their body weight. However, I do know that as we age, we usually can carry less and less. When in my prime I could carry a 60-75 lb pack, today I can’t top 30 lbs. and do best around 20 lbs.
This means anything we put in the bag should be small, compact, light-weight and as multi-functional as possible. For example the basics are:
A pet will need food and water too.
Remember this bag is only to get you from where ever you are when the crisis hits to home in about 3 days or less. It is not intended to allow you to live off of indefinitely.
There are three types of these 72 hour go-bags and each one is needed:
Remember the Doe family? They have an aunt and uncle with their dog that visits once a year and the two children each have a friend that stays over once a month. This means that their household go-bag will be for 4 adults, 4 teenagers and 2 dogs. We can’t account for everyone that might be at our house when a crisis hits, but we sure can account for the most likely number of people that could be in our house.
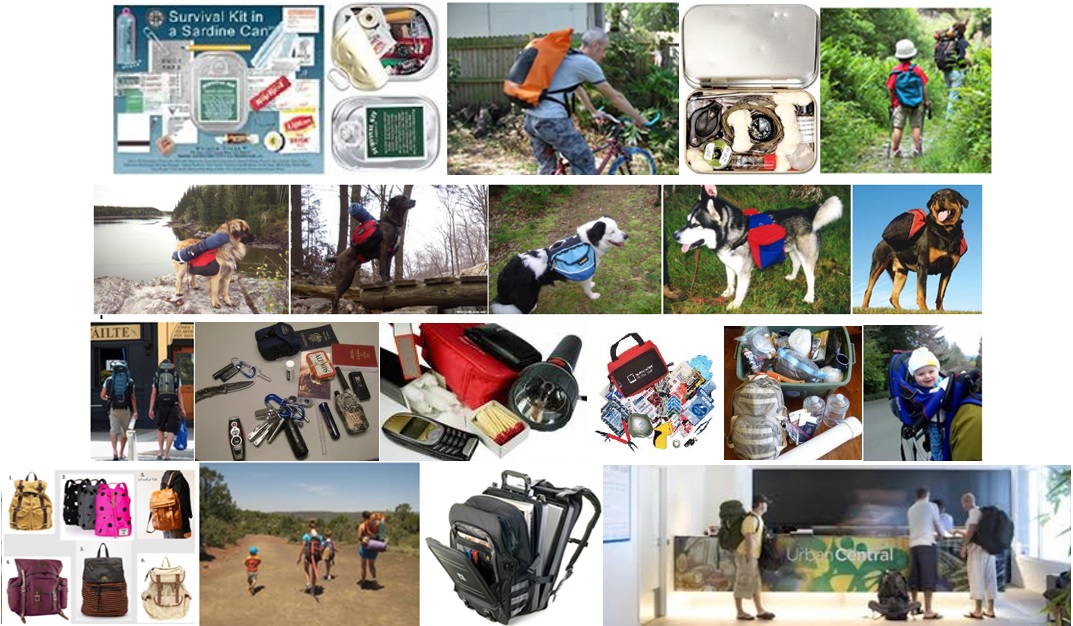
Get in the habit of always having a go-bag with you.
There are some very small, super minimal ‘survival’ kits that can fit in a purse or a glove box. Some homemade ones fit in Altoid tins. Basically, there really is absolutely no reason not to have something with you at all times.
Note: For more detailed information on these various go-bags the following two documents go together. One explains the differences “What is the Difference Between All the E-Kits and Bags and What Do I Need?” and the other is a spreadsheet comparing the various go-bag, camping and backpacking checklists “Preparedness Bags Checklist Compare”
- If this is a dog or cat; be aware that they will need more water if you use dry pet food over moist.
- Some moist pet food is now sold in Mylar plastic pouches, which although expensive, is great for pet go-bag use.
- Go to the pet or sporting goods store where they sell the fabric/Mylar roll up bowls for pets and keep this in the pet’s go-bag.
- If the dog is large enough you can get a dog backpack so the dog can carry its own go-bag.
- For smaller pets you may need a crate and a folding, lightweight luggage dolly with bungee cord
Remember this bag is only to get you from where ever you are when the crisis hits to home in about 3 days or less. It is not intended to allow you to live off of indefinitely.
There are three types of these 72 hour go-bags and each one is needed:
- Individual – One for each family member and or pet that is included in your plan. This is where you can personalize it so if a family member has say asthma, you can include an extra RX and inhaler.
- Vehicle – One for each vehicle. This should account for the maximum number of people and pets that can be in the vehicle at any given time. Here you can use the chain saw type Combat hand saw. This is not the vehicle’s emergency kit with fix-a-flat and universal fan belt.
- Household – Realistically this is more of a duffle bag than a go-bag as it should account for the average number of people and pets that can be in your house at any given time and may need to vacate the house quickly. Here you can use the chain saw type Combat hand saw. This bag should also include your Emergency Documentation Book.
Remember the Doe family? They have an aunt and uncle with their dog that visits once a year and the two children each have a friend that stays over once a month. This means that their household go-bag will be for 4 adults, 4 teenagers and 2 dogs. We can’t account for everyone that might be at our house when a crisis hits, but we sure can account for the most likely number of people that could be in our house.
Get in the habit of always having a go-bag with you.
- If you are a business person there are high end briefcase/laptop case type backpacks that have plenty of room for your go-bag essentials too.
- Ladies, those extra large, over the shoulder satchel style purses are still the rage. Just put a couple of purse organizer pouches in it – one for your purse stuff and one for your go-bag stuff.
- Diaper bags now come in backpack format and have plenty of room for the additional go-bag stuff.
- Younger children can use kiddie suitcases or backpacks (some of these backpacks come with wheels and handles too).
- There is a high end backpack that in the day was called a Kangaroo Pack. It actually consisted of three different packs. A small one that can be removed and worn around the waist, a medium sized one that could be removed and used like a day pack and a larger one, that the other two attached to, which was more like your standard backpack and could be used by itself or with the others attached. In the 70’s this cost about $80 and was more than worth the price.
- There are backpacks for medium to large dogs, so the animal can carry its own go-bag. (There are smaller animal packs too but these small pets don’t have enough umph to carry their own needs.)
- For smaller pets, a crate stored with a small backpack of pet goodies and a lightweight, portable, folding luggage dolly. Store the pet’s go-bag and the luggage dolly with the crate.
- Avoid book bags and fashion backpacks as they are often made of inferior materials and will fall apart under stressful use very quickly.
There are some very small, super minimal ‘survival’ kits that can fit in a purse or a glove box. Some homemade ones fit in Altoid tins. Basically, there really is absolutely no reason not to have something with you at all times.
Note: For more detailed information on these various go-bags the following two documents go together. One explains the differences “What is the Difference Between All the E-Kits and Bags and What Do I Need?” and the other is a spreadsheet comparing the various go-bag, camping and backpacking checklists “Preparedness Bags Checklist Compare”
A quick word about water
Water is essential to human life. We cannot live long without it.
1 Gallon of Water = a little over 8 pounds
Now think about this: The average water needs for humans is about 1 gallon per day and one gallon weighs about 8 pounds. When it comes to mobility, most of us humans cannot carry three days worth of water with us all time, as that is about 3 gallons and 24 pounds of water per person!
Water Needs
Factors that Determine the Water Needs for adults, children and pets:
Water in and of itself never really goes bad. It can get polluted, poisoned and dirty, Yes - go bad, No.
Tip: If you are storing water in large containers it can develop a ‘stale’ or ‘stagnant’ taste. This is easily fixed by putting the water in some kind of clear container and placing it in the sun for a few hours.
Then there was this law that was passed back in the 90’s and went into effect in the early 2000’s that requires all plastic containers, holding liquid for human consumption and of 2 liters or less, to be made with the new bio-degradable plastic.
BYU did a study on this new plastic when used for pre-bottled water. What they discovered is:
This bio-degradable plastic is also much weaker than re-usable plastic containers. It splits, cracks and punctures easily. Yes, re-usable plastic water bottles are stronger than the bio-degradable pre-filled ones are, but these too can handle less heat or cold and become brittle and break quicker than metal.
It is for these reasons that I recommend the stainless steel water bottles over pre-bottled or reusable plastic bottles, especially for any long term storage of water in say, a rarely used go-bag.
Let’s face it – if we want to accomplish anything worthwhile, we can’t pay someone else to do it for us; we can’t just buy it - we need to DO IT ourselves!
Next time we will discuss the last piece of information collection needed to form our Needs Based Preparedness Plan. Oh and it too is often unpleasant and overlooked. Can you guess what it is?
TNT
Water is essential to human life. We cannot live long without it.
1 Gallon of Water = a little over 8 pounds
Now think about this: The average water needs for humans is about 1 gallon per day and one gallon weighs about 8 pounds. When it comes to mobility, most of us humans cannot carry three days worth of water with us all time, as that is about 3 gallons and 24 pounds of water per person!
Water Needs
- General Rule with hygiene: MINIMUM is 1 Gallon per person per day
- Human General Average: MINIMUM of 2 liters or 8 cups per day to maintain efficiency; In general one quart of water is needed daily for every 50 pounds of body weight; Children require about 4-6 cups of fluid per day on average.
Factors that Determine the Water Needs for adults, children and pets:
- Age
- Weight - The heavier a human or pet is, usually means they need more water to sustain themselves.
- Activity - The less active one is; the less water they can get away with.
- Health - A female that is pregnant or nursing needs more water than one that is not.
- Dry pet food will require more water for the pet than wet pet food. (for more detail on pet needs see Prepping for Animals, Pets and Livestock and Pet Health, First Aid Kit & Preparedness)
Water in and of itself never really goes bad. It can get polluted, poisoned and dirty, Yes - go bad, No.
Tip: If you are storing water in large containers it can develop a ‘stale’ or ‘stagnant’ taste. This is easily fixed by putting the water in some kind of clear container and placing it in the sun for a few hours.
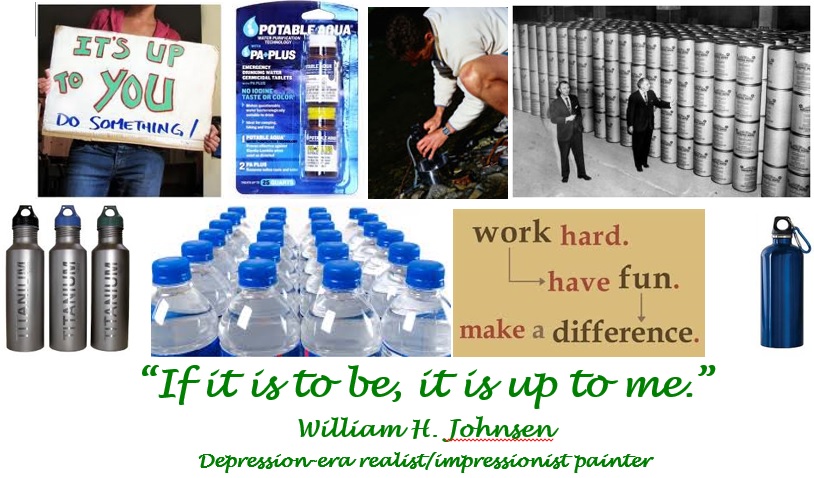
Then there was this law that was passed back in the 90’s and went into effect in the early 2000’s that requires all plastic containers, holding liquid for human consumption and of 2 liters or less, to be made with the new bio-degradable plastic.
BYU did a study on this new plastic when used for pre-bottled water. What they discovered is:
- In about 1 to 1 ½ years the plastic degraded enough to taint the taste of the water. Not poison it, just taint the flavor, and that one could not ‘refresh’ the taste out by any means.
- After 2-3 years the bottles degraded enough that over 50% of them were leaking.
- Kinda explains those expiration dates on the pre-bottled water doesn’t it?
This bio-degradable plastic is also much weaker than re-usable plastic containers. It splits, cracks and punctures easily. Yes, re-usable plastic water bottles are stronger than the bio-degradable pre-filled ones are, but these too can handle less heat or cold and become brittle and break quicker than metal.
It is for these reasons that I recommend the stainless steel water bottles over pre-bottled or reusable plastic bottles, especially for any long term storage of water in say, a rarely used go-bag.
Let’s face it – if we want to accomplish anything worthwhile, we can’t pay someone else to do it for us; we can’t just buy it - we need to DO IT ourselves!
Next time we will discuss the last piece of information collection needed to form our Needs Based Preparedness Plan. Oh and it too is often unpleasant and overlooked. Can you guess what it is?
TNT
 RSS Feed
